Showing posts with label Tim Holtz. Show all posts

Wednesday, September 28, 2022

Art journaling in progress.

 This months theme in Dragonfly Dreamers Exploration group is '30 ways to fill you art journal'. It's been good to spend so much time in my art journals. I'd like to tell you that I spend some time art journaling everyday but real life just doesn't work that way. So I art journal whenever I get a chance. Sometimes it may be 5 minutes and others it may be hours. It gets whatever and whenever life allows.


If you've followed along with my art journaling at all, you may have noticed that I don't work on one page at a time. Actually I don't even work in one journal at a time. Nor do I work from the front to back of an art journal much to the surprise of a student, I had recently, who just couldn't fathom that was a thing people did. Well yes it's a think people do. At least I'm pretty sure I'm not alone in this practice. I like to just open up to whatever page is calling me at the moment and start there or continue if the page is already started.

This page layout was comprised of about 5 or 6 short, 5 to 15 minute sessions over about a week. In that time I probably worked on some other pages but this one kept calling and telling me what it wanted next. Sometimes that's how it works. Other times a page can take months or years before it calls me back to finish it.

Mica spray and watercolour ink
The first layer on the spread was just a quick splash of Cosmic Shimmer Watercolor ink and Distress Mica spray. I love the contrast of the shimmery spray with the matte watercolor ink. A quick background that took less than 5 minutes to do but then needed lots of dry time. It could be dried with a heat gun but the effects are different and my time was up anyway.

Washi tape and stamping
Next I used washi tape. I like to rip the tape length wise to get rid of the harsh straight lines. Using a large stamp without a block helps to give that random stamping look. I used Archival ink for this because I know it will be permanent no matter what I want to add on top of it.


Stabilo all, graphite and embossing powder

A few lines and squiggles with the Stabilo all pencil and graphite stick help bring everything together. Since they are both water soluble I used a wet brush to loosen up and smudge the lines a bit. The gears are a die that I added embossing powder to before adhering them to the page.
Stencil, grit paste and Fude pen

I had to add some grit paste because it was new on my desk and just asking to be tried. The brick stencil just seemed to work with the grungy layout. I discovered that the grit paste will reactivate anything water-soluble that you put it on, so where it is on top of the Distress mica sprays it turned a lovely rusty red. You can see the actual colour of the Grit Paste in the top right hand corner.

To finish off the page I used the Fude Ball pen to darken some of the lines and do some writing. 

If you'd like to see more of my pages as well as other members for '30 days to fill your art journal' you can find us here.


Happy Creative!

Wendy


Monday, November 19, 2018

Inky fun with Christmas Cards

It's that time of year again when we get into the Christmas crafting mood. 
I had a great group of ladies in the studio this past weekend to get inky and make some Christmas cards. We used Distress Inks and Oxide to make the backgrounds and then embossed some die cuts for some extra dimension.
Look at all the colour and variation in these cards.
Barb

Beth

Chris

Cindy

Kathy

Nancy

Sharon
Have you started your Christmas cards yet?!

Keep Creating!
Wendy

Friday, March 8, 2013

Altered metal drawer set.

 After finishing the next set of drawers, I was again left with the decision of what to use for drawer pulls. I had a few ideas, but  decided on these Tim Holtz faucet knobs. I used black alcohol ink to make them darker. I knew there was a reason I bought that black alcohol ink, it just took me a few years to figure it out! 
 This set has 3 drawers, all the same size. I'm going to be keeping my metal embossing tools in it so it seemed appropriate to use metal for the drawer fronts. 
This is the same technique  I do when teaching this mirror. It's kind of like a puzzle once most of the metal is embossed. It takes me a while to figure out where it all fits together. As I was working on this I thought I would want to do some kind of design on the sides but once the drawers were put in, it didn't seem to need anything else. So here it is all finished.

My next metal embossing workshop is Sunday, April 7 at Laura Daub Studio.

What are you creating this weekend?

Wendy

Wednesday, January 30, 2013

Altering a set of drawers

This set of drawers has been sitting in my studio for years waiting for something interesting to happen to it. Actually I have two more similar ones waiting also. I've had a few ideas over the year but never got around to doing it. One of them even has part of it painted but I'm pretty sure it's not going to be going in that direction any more. Well when it was time to move things up into the new studio I knew these guys would need to finally get their make over to fit into my amazing new space. So I finally got started on them this weekend.

 After a lot of leafing through piles of scrapbooking paper I finally decided on these. Everything went pretty fast after that. The process was very similar to last weeks book shelves except I didn't put a layer of gel medium on top this time. Here the paper has been cut and glued to each drawer. I turned the drawers around so the notch is at the back.
 I sanded all the edges of the cabinet and each drawer. The sides look a little boring when I see them now but where it's going it's not really going to be seen much.
Once sanded I got out my favourite Distress ink, Vintage Photo and antiqued all the edges. Now I just need to find some handles for it. I'm thinking of using Tim Holtz label Pulls but I'll have to see if I can get my hand on some more. Or I may try to figure out how to make my own interesting drawer knobs. Any suggestions, have you ever made draw knobs, maybe out of buttons?!!

Keep Creating!

Wendy

Wednesday, April 4, 2012

Finally day 8 and 10 finished

What can I say, better late than never! I finished the the Creative Chemistry with Tim Holtz online workshop. Although it wasn't necessary to watch and do the work during the 2 weeks that it was live, I tried to challenge myself to keep up anyway. I know I will go back to re-watch the videos again because their was so much information to learn in just one sitting. I really enjoyed it and recommend it to anyone interested in learning about how different product work both alone and with other products. It really inspired me thinking about the products I have already and how to mix and match them to create my own techniques now that I know the basic chemistry of how things work well together or not.

So here are my last few tags of the workshop.
 This is the Paint Dabber Resist technique. I had to do some improvising again for this technique but I think it worked out pretty well. This was done on Sticky Back Canvas which I actually had but had never worked with yet. Yes I'm guilty of purchasing something and leaving it in the package for a few years before using it. I know a lot of you out there are guilty of the same thing. Well any way, I was glad to have a reason to try it and really enjoyed working with the canvas. It won't take me so long to get it out to use again, I hope!
 This tag has both the Crackle Paint Resist Technique(the background crackle) and the Shattered Stains Technique(butterfly) on it. I've worked with these Crackle paints before but I don't think I was applying the correctly so this was very helpful. I really like the way the Shattered Stains butterfly turned out. I would never think to put the crackle paint on so thick but it was very effective.
The last day of class we had only one tag to make so this made it a little easier for me to catch up. This was the Rock Candy Distress Stickles Technique. I wasn't crazy about my finished tag and the photo certainly doesn't do the Rock Candy justice but I'll be trying this again some time.

Well thanks for following me along my Creative Chemistry journey. I hope to share some creations in the near future using some of the new techniques I learned.

Happy Creating!

Wendy

Friday, March 30, 2012

Day 7 and 9 of Creative Chemistry.

Ha, I thought I was doing pretty good with the Creative Chemistry class this week. I was all ready to show you my day 8 and 9 tags so I can go do day 10 and then as I was about to post it I saw that the last post was for day 6. Well that didn't make sense. So after checking the site and sorting through my tags I realized I had completely missed day 8. I don't know how, I don't know where I was or what I was doing but it happened. So I'm going to show you day 7 and 9 today and then I guess I'll catch up on day 8 and hopefully find time for day 10. Who knew taking an on-line class would be so demanding that I could lose a whole day.
Any way here are my tags. This was suppose to be a short and sweet post so I can get on with day 10, now to be days 8 and 10 but I got a little carried away taking pics, so be patient with me and enjoy.
 This is Distress power resist. I only had 2 colours of Distress power so I tried both but wasn't really happy with either one. I think a lighter colour like Tim used would be more effective.
 Here is Rusted Enamel technique. I think this was interesting and I will definitely be doing some more experimenting with the colour variations possible.
The Nostalgic Batik was a lot of fun. I've done variations of this before but hadn't used the coloured inks under the clear embossing power before so I can see a lot of different applications for this now. Oh and I got to use a new stamp I got this week. Well new to me anyway. A friend was cleaning out her stash and I purchased some wonderful new to me stamps. I know I'm suppose to be purging to move to the new studio space but what's a girl to do!!
 Here is some Perfect Distress mist. Always fun to spray and spray and spray to see what mystical background come out. I definitely need some more mini misters, oh the colour combinations between ink and mica powder are endless...
 The Perfect Distress wasn't too perfect in my world and unfortunately the photo looks even worse than the tag did. It's an interesting technique though. I'll have to work on it a bit more obviously.
The Perfect Splatter Distress was fun again too. Another new twist on a fun technique. Hard to see here but I love the way the Perfect Pearls just show up here and there rather than all over the tag.

So that was supposedly my short post for the day. I'm off to watch some more super cool techniques. I'll share them as soon as I can. LOL.

Keep Creating.

Wendy

Monday, March 26, 2012

More improvisation, day 6

Yes another day of not having the products for the Creative Chemistry class. As I watched the videos this morning I thought, oh well I have other stuff I should be working on any way. And then my brain clicked, yes I think I even heard it, as it so often does, only not as fast as I'd like it to and there was the answer. I may not have the Distress markers but I have a good selection of Tombow watercolour markers so why not use them and see if they'll do some of the same things. Tim did tell us to use what we have so that seems to be working for me so far. I don't use my water colour markers a lot so this is a good opportunity to get some more use out of them.
 I thought it would be interesting to try the different techniques with the same image to compare with after. The top one is the water colour with markers technique. It really doesn't take much to get a lot of colour with these markers. The two bottom butterflies are the stamp with markers technique. The one one the left is the first printing and the one of the right is the second printing but with water misted onto the stamp first. I think the stamping with markers is my favourite thing to do with markers, it's just so easy.
Here are the same techniques with a different image. You can see that the image makes all the difference. Some images just don't look that great as a really washed out water colour.

Well such was my experimenting for today. I'm pretty sure I have the supplies for tomorrow so I think it will be more fun for me.

Happy Creating!

Wendy

Sunday, March 25, 2012

Improvised day 5 Creative Chemistry

Well I told you earlier that day 5 was a problem because I don't have any of the products Tim used for that day but I got into the spirit of Creative Chemistry and improvised, big time. Yes it's hard to believe that I don't own any Distress stains or sprays. He certainly makes it look tempting though.
So here are my tags I created today. I decided not to put images on my tags for today so I'll used them just as demo tags for these new techniques.
 This is the Marbled stains technique except I call it the Marbled inks and paint technique since I used Distress ink pads and misters and a little white acrylic paint watered down. I think it worked pretty good although I think I'd really like to get my hands on some Picket fence stain. As you can see the white paint didn't mix in as well as the stain would have. I'm happy with it though and will do my own version of this technique again.
 This is my version of Kraft resist. I didn't have any Kraft resist paper so I made my own with varnish. The one on the left is done with a stencil and the varnish was lightly sponged on. The one on the right the varnish was put on with a liner brush, lots of fun. And again since I didn't have any stains I used my Distress ink pads and re-inker misters. I know they're not the same as Tim's but I'm pretty happy with them. Oh and they're not actually on Kraft paper. I tried it on Kraft paper first but I think the paper was too porous and once I inked them the varnish resist hardly showed up at all and everything got very dark and ugly. So I tried them on regular manila tags and it worked wonderfully.
This is actually a do over from day 4. I didn't like how my layered mist technique turned out, since it came out so dark so I redid it and sprayed the tag with water before starting and the results were much better.

So that is how my day 5 turned out. Lots of fun and experimenting. It's really got me thinking about mixing things up more and trying things out just to see what happen. Well that what Tim keeps saying so I guess the class is a success for me. Can't wait to see what tomorrow brings.

Happy Creating

Wendy

Day 4 Creative Chemistry

Well I'm slowly getting caught up with my on line Creative Chemistry class. I'm starting to have a few challenges with not have the same product that Tim is using but today I was able to do the tags with what I had. I wasn't thrilled with my result for day 4 but that was partially because of lack of supplies and partially just because they weren't my favourite techniques.
I cheated for the custom stamp pad technique. I made this one a while back so I just re-inked it to get it going again. It worked even though he suggested to use a stamp with lots of solid areas which of course I didn't know when doing this but I like it all the same. For the water colour technique I had limited colours in the re-inkers so I wasn't too happy with the end result. They are definitely on my shopping list. Again for the layered misting technique I had limited colours and limited misters to make the sprays so the colour combo wasn't very satisfying but I'll definitely do this again when I get more re-inkers.

I'm having even more trouble with day 5. At first I thought I wouldn't be able to do any of them since I didn't have one product he used but then my brain kept turning until it reminded me that it is called Creative Chemistry so that's just what I did. I'm working on making some craft resist paper and I found some substitutes for the marbled technique. So I'm off to finish them up so I hope to share them with you soon.

Happy Creating

Wendy

Thursday, March 22, 2012

Creative Chemistry 101

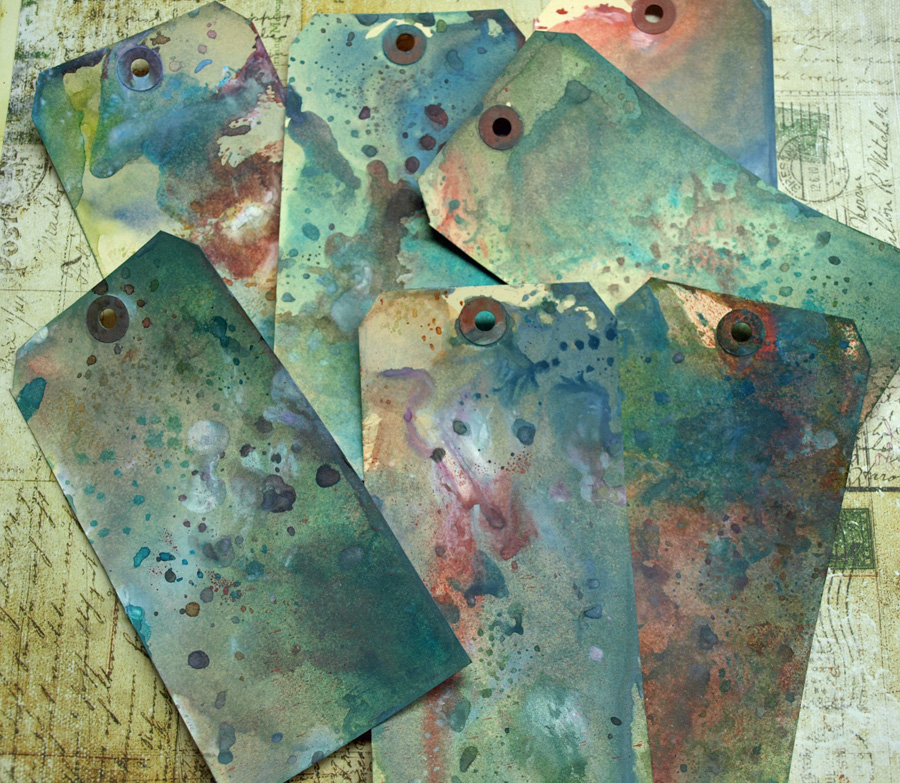
I started the Tim Holtz Creative Chemistry 101 online workshop on Monday and it's been great but I've been a little busy with other things so I'm kind of slow at showing you what I've done so far. To catch up a bit I'm going to show you the first few days of tags. It's all about techniques which is what I like best. We're learning a lot about the chemistry of many different products so it will be easier to explore further on our own. This is just my kind of chemistry class! Day one was all about terminology and properties of certain products, very informative but no play time so no pictures.
 This is day 2's tags. Fun and easy backgrounds.
Here is day 3's tags. Again fun and easy backgrounds with a few new twists to them.

I'm hoping tomorrow I'll have time to get day 4 and 5 done to share with you. Can't wait to do more inking.

Happy tag making!
Wendy

Wednesday, March 21, 2012

ATC meeting

Yesterday was my monthly ATC meeting and I just managed to remember to take pictures of everyone's cards. This months theme was "in like a lion out like a lamb". We were a small group this month but still had a great time. Here are the ATCs.
 Lucie
 Virginia
Wendy
This is just how our March has played out so far here in Eastern Ontario. We started off with a nasty snow storm and now we're getting record highs in the mid 20's. I don't know if it can last till the end of the month but my fingers are crossed for it.

I started the Tim Holtz Creative Chemistry 101 on line class this week and  it's been lots of fun so far. It's all about techniques and the process. I'll share some of the tags with you soon. I'm also thinking I'll have to purge some of my older tags to make room for these new ones. So maybe I'll give away a few tags soon too. Anyone interested in winning a tag?

Happy creating!
Wendy

Monday, May 23, 2011

Grungy Monday


I really enjoyed last weeks Grungy Monday. Thank you all for such lovely comments.

This weeks Technique is an easy one again but my choices of dye inks is very limited so I wasn't feeling very inspired. I'm afraid I didn't sway much from the sample. Check it out here.

http://timholtz.typepad.com/my_weblog/2008/08/september-techn.html

I've done water colour stamping before but I have to say it's not one of my favourites. I find it hard to get just the right amount of water on the stamp so you don't loose your image completely. On this card I tried Glimmer mist instead of water and I really liked the results and it seemed to be easier to not over do the wetness. Unfortunately you can't really see the glimmer here though.

I'm curious to see how others have used this technique since I can't really think of a lot of uses for it. I think I prefer techniques that I can play with and change up a little more than this one.

So head over to Studio L3 and see what others are doing with this technique.

Happy Creating

Wendy

Monday, May 16, 2011

Wow guest designer for Grungy Monday.

Yes me a guest designer! I'm so excited I can hardly write. See this is my first time, yes I'm a virgin guest designer, so be patient with me if I stumble or fumble a bit and please help me if you see anything I should be doing differently.
So here's the juicy details. Linda over at Studio L3 host Grungy Monday each week in honor of his Craftiness Tim Holtz. Each week she chooses a Tim Holtz technique and asks 2 guest designers to make something with the technique and post about it. So this week it's my turn.

This weeks technique is Distress Ink colour blocking. It's an easy and versatile way to make a background.

As soon as I got the e-mail from Linda with the info I watched the video right away. And although it's a really easy one I was kinda stumped for ideas. I played with it on some scraps of plain paper to get the hang of it and try out different colour combos. Then I let it sink into my subconscious for a week or so(no I wasn't procrastinating...okay maybe a little) things started to form and once I started it the project grew from a small plaque to a whole book. LOL. That's just the way things work out sometimes. I actually didn't get all the pages done that I wanted to. I have 2 more on the go. Hopefully I'll get them done in the next day or so and can show you then.

I used the Colour Blocking technique for the background of each page. On this one I adhered some old book print on one side first and then did the colour blocking across the whole thing. It was interesting to see the different effects on the 2 surfaces. The inks reacts differently on the different surfaces creating different colour intensity.
Here I used a numbers Crafters Workshop stencil on the already colour blocked background. It just took a little Tea Dye DI to get the numbers to pop out over the blocking. I like the way it tones down the but doesn't completely cover them.
Again here I used some scrap paper to cover part of the background before doing colour blocking. This paper reacted differently from the old book print. I think the old book print absorbs some of the ink making it more muted that other surfaces.

This book was a lot of fun to create. Can't wait to get the last 2 pages finished. It's been a while since I've done this kind of project and I hadn't realized how much I missed it and really must find more time to do this kind of creating.

I hope you enjoyed my book today. You really must go over to Studio L3 to check out what everyone else has done with this technique.

Here are the supplies I used:
Crafters Workshop- stencils
Ranger- Distress Inks
Sizzix- Dies
Tattered Angels- Glimmer Mist, stamps
Studio 490- stamps
Tim Holtz- stamps
Hampton Art- stamps
Prima- flowers, leaves
BoBunny- Edgy Album

Thanks for stopping by have a creative week.

Monday, December 6, 2010

Tim's tag time...


Well it's that time of year again over at Tim Holtz's blog. The twelve tags of Christmas that is. If you haven't checked it out yet it's well worth the look. Lots of tips, tricks and techniques. I don't usually get around to getting all of them done but I like to play along a bit. So here is my variations of tag 2 and 3. Enjoy!

Sunday, August 8, 2010

New work

I had a great time at the North Gower Market yesterday. Met some wonderful people and purchased some great food. We had an amazing homemade onion pizza for supper last night from Nina who was right behind me selling vegetable and baked goods. Looking forward to next weeks market.


As promised here is a piece I created this week. The background paper is 7 Gypsy and the images are from Graphic 45 Communique tag sheet. And then I added a few found objects like the domino piece and some embossed metal. To finish it off a few Tim Holtz additions like the ticket and film strip with unknown Southin's added.

Tomorrow I'll be showing you some of my new jewelry creations, finally.

Have a great day.

LinkWithin

Related Posts Plugin for WordPress, Blogger...