Showing posts with label distress inks. Show all posts

Wednesday, March 18, 2020

Monthly Explorations


   It's been an interesting year so far to say the least. I've been taking some time to reboot and work on some new projects over the winter and just when I am ready to get back to doing some workshops the world has turned upside down. Now it's time to rethink the next  steps to take.
   Being an introvert makes the social distancing an easy thing to do for me. So I'm choosing to take advantage of my extra time alone in the studio to play and catch up on things. I hope you're able to make the best of the situation and give yourself permission to play.

   One of the things that has kept me busy this year is my Monthly Explorations Themes over on my FB group. In January the theme was Doodling, Mark Making and Drawing. What's not to like about that!

8"x5" journal page on Bristol Smooth

9"x11.5" Dylusions journal page.

In February the theme was Stencils. I love my stencils and use them often. There are so many ways to use them. Here are just a few.

Since it was February I had to do a few heart cards. I made my own heart stencil with a heart die I have and then layered other stencils on top of it for the patterns. I used Distress Inks and Oxides for the colours along with some light modeling paste and Finnabair Icing Paste for the texture through stencils.

Multiple layered stencils.


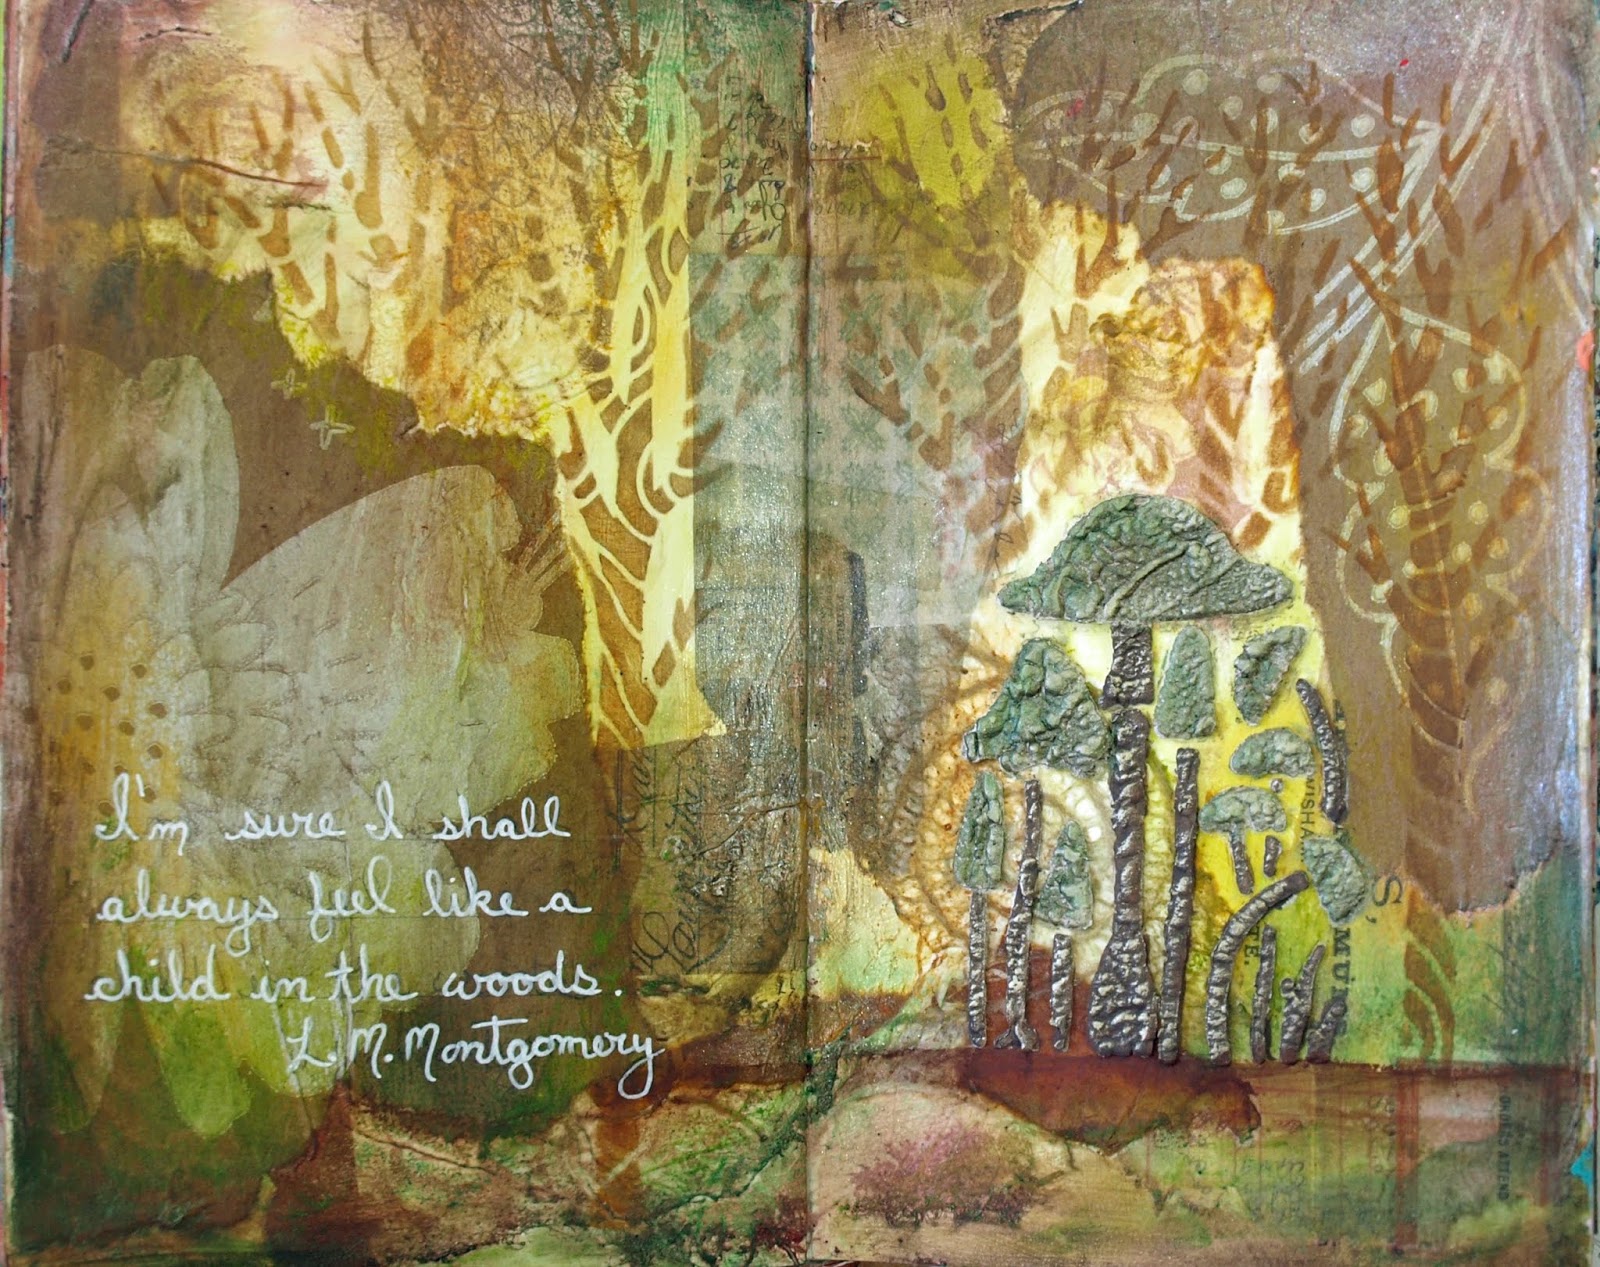
This page was done with a lot of layers of collage material, paints and stencils. The mushrooms were a new stencil I got recently from Stencil Girl. I used Nuvo Expanding Mousse through the stencil. This was an new product for me and I loved the way it puffs up when heated. Once dried I coloured the mushrooms with Finnabair waxes.

9.5"x8" double page in small Dylusions journal.

This is another page done with lots of layers and even more stencils. But here the stencils are used mostly in the background instead of the focal point as the mushrooms were. 
9.5"x8" double page in small Dylusions journal.


  And now in March the theme is Watercolour. This is not a medium that I play with much or know much about so it really is about exploring and learning. 
  I made myself a small book with 5.5"x5.5" watercolour paper pages to do my playing/experimenting in. It is a nice size to try out something new.

   I did a few pages of rocks. They were great for practicing some mixing and layering of colours.
Watercolour rocks.
   These little swatch doodles were inspired by a fun Canadian Artist, Cee Cee's Creations. You can find many of her videos on Youtube. They were very fun to do. I'm sure I will be doing more of them this month. 

Watercolour swatch doodles.
  If you'd like to see more come over and take a look at Dragonfly Dreamers Monthly Exploration Themes. And of course you are always welcome to join the group.

Keep Creating!
Wendy


Tuesday, November 19, 2019

Card making time.

It's that time of year again! Have you starting your Christmas cards yet? Do you make your own cards? Do you even send out cards any more?
Well here in the studio we've been making cards like crazy. My Creative Studio Tuesday evening group has been busy with Christmas creating since the beginning of the month. This past Saturday was the Christmas Cards workshop. As with most of the workshops, once they learned the basic techniques they have an infinite number of ways to go with their cards. Just take a look at the wonderful variety they created. 
Deb

Janice

Kathy

Linda

Spike

I hope you receive a few cards as lovely as these this year.

I will have a few of my cards for sale along with everything else creative I've been up to this year, at this Sundays Open Studio here in the studio at 3557 Munster Rd. I will be here with friend selling our creative wares from 11:00 am to 4:00 pm. Come on out for a coffee and some lovely company. See you soon.

Happy Creating!
Wendy

Monday, November 19, 2018

Inky fun with Christmas Cards

It's that time of year again when we get into the Christmas crafting mood. 
I had a great group of ladies in the studio this past weekend to get inky and make some Christmas cards. We used Distress Inks and Oxide to make the backgrounds and then embossed some die cuts for some extra dimension.
Look at all the colour and variation in these cards.
Barb

Beth

Chris

Cindy

Kathy

Nancy

Sharon
Have you started your Christmas cards yet?!

Keep Creating!
Wendy

Tuesday, February 10, 2015

Double embossing tutorial.


I've seen and tried so many different techniques for embossing I was surprised but delighted to come across one more while watching a Tim Holtz video on Scraptime. Even though I didn't have the texture paste he used yet, I had to try the technique right away with what I did have. I love to find a technique to use supplies I already have or to try it even if it's not exactly the same. It's like experimenting and I did like chemistry way back when...
 When I went looking to see what texture paste I had  to use I found a few and decided to try them all. Here, from left to right are Liquitex Modeling Paste, DecoArt Terra Cotta Texture paste, Golden Crackle Paste, Tri Art modeling paste, Jo Sonja Texture paste and DecoArt Media Crackle Paste white. I do like my texture pastes!! They all worked great and most of them came out quite similar. While most of them had a somewhat smooth surface the two DecoArt products looked different then all the others with more texture on one and crackle on the other. 

   The Terra Cotta Texture paste had a gritty texture when applied and this showed in the end result which was interesting. The DecoArt Media crackle paste white, shown above, resulted in a great crackle effect. The Golden Crackle paste has the smoothest end result. 
   But I am getting a little ahead of myself. Here is how I went about trying this technique and making the tag.
 
I started off by using a tag in my stash that already had some colour on with Distress inks and Glimmer mist. I added the pattern on with Dusty Concord Distress Ink and part of a Crafters Workshop stencils.
                                       
As part of the background I used this die cut feather and embossed it by tapping the embossing ink all over it and then sprinkling embossing powder on it before melting it with the heat gun. It was then glued on to the background.
Now for the fun part, double embossing. Mask off the part of the stencil to be used. This is another Crafters Workshop stencil with a variety of leaves or feather, depending who you ask. Today it's a feather!
With a palette knife gently smooth the paste over the stencil. Don't over work it or it will bleed under the stencil. Take the stencil off and wash right away. I used the DecoArt Media Crackle paste white for this project. I really liked the crackle effect on it. I love using the texture paste just like this, it can be inked or painted once dried. But this technique kicks it up a notch. While the paste is still wet, sprinkle embossing powder all over and shake off excess. I used copper embossing powder for my project. So it's double embossed, hence the name I gave it. 
Now the hard part, wait until it's dry before heat embossing the powder. If it's heated before it's dry more texture will result, which could be a good thing too. At this point it's very fragile and can be damaged easily if touched, so place it out of the harms way. Mine was very dry before heating it since once I walk away to let it dry I'm off on another project and it doesn't get done until I happen to remember or come across it again. 
Once the feather was heat embossed I noticed the paste leaked under the stencil so I used a black Stabilo All pencil and water to darken around the feather a little. It didn't completely cover the white but made a nice shadow around the feather. This is before the pencil. I then add the sentiment stamp and some ribbon and charms at the top.
The wonderful puffiness of this technique really makes the central feather standout and it needed little more to finish it.

I hope you enjoyed this tutorial. Please let me know if you have any questions or comments about it. And if you try this technique or have already tried it please share your creations here. I'd love to see and hear how you used this double embossing technique.

Happy Creating!
Wendy


Wednesday, November 27, 2013

Last studio workshop for the year

Tags inspired by my students.

I can't believe we've come to the last workshop in the studio for this year. It's been a great year here in the studio for lots of creating. This past Sunday was a really fun day of doing some Christmas Mega Tags. These tags are something I've been playing with for a few years. sometimes getting a few friends together for a play day of making Christmas tags, so when one of my students asked if I was going to be doing a workshop with them I was delighted to accommodate. This is really just about playing with Distress inks, Glimmer Mists, stencils and embellishments. My hope was that each person would get about 5 tags finished so I think we did pretty good and the results speak for themselves.
Cindy

Josee

Kim

Nancy

Sharon
It was a great way to get me into a creative Christmas mood. As usual after class the creative vibes continued and I got a few more tags and some cards made.
What's your favourite go to Christmas creations?

Happy Creating!
Wendy

Thursday, February 14, 2013

Distress Ink cards

Well once I get started on the Distress ink backgrounds it's hard to stop so I made some cards while the table was a mess. Here are a few of them.


What have you been creating this week?

Wendy


Tuesday, February 12, 2013

Distress ink bookmarks.

I think this is my favourite thing to do with Distress Inks... make backgrounds for cards and bookmarks.
Have you tried this before? You just dab 3-4 colours of ink right onto the craft mat, spritz with any liquid, I used glimmer mist and then swish your paper in it. Instant colour splashes. The Tin Man thought a little wine would help while I was creating that night. Well it didn't seem to hurt!
I then used my ink dabbers and stencils to add some more colour and designs here and there.  The most difficult part is choosing which stamps to use to finish it off. I used  black Versafine for the stamping. Once dried I mounted them on coloured card stock for a little extra support and to hide the mess I usually make on the back of them. 

What's your favourite thing to do with Distress Inks?

Happy Creating

Wendy


Wednesday, January 30, 2013

Altering a set of drawers

This set of drawers has been sitting in my studio for years waiting for something interesting to happen to it. Actually I have two more similar ones waiting also. I've had a few ideas over the year but never got around to doing it. One of them even has part of it painted but I'm pretty sure it's not going to be going in that direction any more. Well when it was time to move things up into the new studio I knew these guys would need to finally get their make over to fit into my amazing new space. So I finally got started on them this weekend.

 After a lot of leafing through piles of scrapbooking paper I finally decided on these. Everything went pretty fast after that. The process was very similar to last weeks book shelves except I didn't put a layer of gel medium on top this time. Here the paper has been cut and glued to each drawer. I turned the drawers around so the notch is at the back.
 I sanded all the edges of the cabinet and each drawer. The sides look a little boring when I see them now but where it's going it's not really going to be seen much.
Once sanded I got out my favourite Distress ink, Vintage Photo and antiqued all the edges. Now I just need to find some handles for it. I'm thinking of using Tim Holtz label Pulls but I'll have to see if I can get my hand on some more. Or I may try to figure out how to make my own interesting drawer knobs. Any suggestions, have you ever made draw knobs, maybe out of buttons?!!

Keep Creating!

Wendy

LinkWithin

Related Posts Plugin for WordPress, Blogger...