Showing posts with label texture paste. Show all posts

Thursday, August 23, 2018

Textures in Excavating Layers

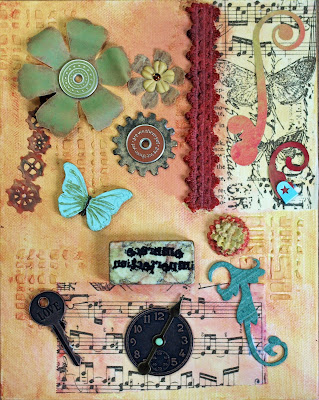
Excavating Layers is my newest workshop in the studio this year. I've been enjoying playing with a lot of texture pastes for a few years and have finally figured out how to incorporate that into a workshop. Texture paste, and making my own versions of texture paste is one of my favourite things to play with. There is just so many things you can do with it. In this workshop we mix a variety of things together to make our own texture.  The possibilities are endless, as you can see from my students pieces. I even had one student bring some gears and found object to make a layer with. A few of them are not sure if they are finished but they are pretty close to it. 
Lisette

Louise

Janet

Donna
I have a few of my own in the works, so I'm off to play in the studio and try to finish some.

Keep Creating!
Wendy

Friday, October 13, 2017

A Moment in Time.

I wish I could name all my workshops 'A moment in time'! It's like the whole world stops while I come together to teach a group of students something creative. While they are in the studio nothing else matters. We delve into the world of creativity. Yesterdays canvas workshop was just like that. I had a great group of ladies here in the studio to create these wonderful canvases. I love how each made a truly unique canvas with similar techniques. 
Danielle

Deb

Diane

Sharon
This workshop was all about texture and dimensions. Lot's of layers with texture paste and found objects.

Happy Creating!
Wendy


Tuesday, August 23, 2016

More Tag-a-Day Stencil Challenge

Here is the next bunch of tags from this months challenge. I've discovered that doing the backgrounds are the easy part and then trying to figure out how to finish them can be a little more difficult. I think this week in Creative Studio we will be discussing ideas for focal points and finishing our tags.
Day 14- Fly

Day 15- Fearless

Day 16- Believe

Day 17- My Story

Day 18- New Day

Day 19- New Growth

Day 20- Explore
Happy Creating!
Wendy

Monday, August 15, 2016

Imagination is Boundless Workshop

I had a great time this past Saturday with these wonderfully creative ladies doing the 'Imagination is Boundless' workshop. As always, great fun and inspiration to see what they create with just a little guidance. 
Anne

Kathi

Sharon

Next workshop coming up is 'Life in Layers' Aug. 28. Still a few spots left.

Happy Creating!
Wendy

Tuesday, February 10, 2015

Double embossing tutorial.


I've seen and tried so many different techniques for embossing I was surprised but delighted to come across one more while watching a Tim Holtz video on Scraptime. Even though I didn't have the texture paste he used yet, I had to try the technique right away with what I did have. I love to find a technique to use supplies I already have or to try it even if it's not exactly the same. It's like experimenting and I did like chemistry way back when...
 When I went looking to see what texture paste I had  to use I found a few and decided to try them all. Here, from left to right are Liquitex Modeling Paste, DecoArt Terra Cotta Texture paste, Golden Crackle Paste, Tri Art modeling paste, Jo Sonja Texture paste and DecoArt Media Crackle Paste white. I do like my texture pastes!! They all worked great and most of them came out quite similar. While most of them had a somewhat smooth surface the two DecoArt products looked different then all the others with more texture on one and crackle on the other. 

   The Terra Cotta Texture paste had a gritty texture when applied and this showed in the end result which was interesting. The DecoArt Media crackle paste white, shown above, resulted in a great crackle effect. The Golden Crackle paste has the smoothest end result. 
   But I am getting a little ahead of myself. Here is how I went about trying this technique and making the tag.
 
I started off by using a tag in my stash that already had some colour on with Distress inks and Glimmer mist. I added the pattern on with Dusty Concord Distress Ink and part of a Crafters Workshop stencils.
                                       
As part of the background I used this die cut feather and embossed it by tapping the embossing ink all over it and then sprinkling embossing powder on it before melting it with the heat gun. It was then glued on to the background.
Now for the fun part, double embossing. Mask off the part of the stencil to be used. This is another Crafters Workshop stencil with a variety of leaves or feather, depending who you ask. Today it's a feather!
With a palette knife gently smooth the paste over the stencil. Don't over work it or it will bleed under the stencil. Take the stencil off and wash right away. I used the DecoArt Media Crackle paste white for this project. I really liked the crackle effect on it. I love using the texture paste just like this, it can be inked or painted once dried. But this technique kicks it up a notch. While the paste is still wet, sprinkle embossing powder all over and shake off excess. I used copper embossing powder for my project. So it's double embossed, hence the name I gave it. 
Now the hard part, wait until it's dry before heat embossing the powder. If it's heated before it's dry more texture will result, which could be a good thing too. At this point it's very fragile and can be damaged easily if touched, so place it out of the harms way. Mine was very dry before heating it since once I walk away to let it dry I'm off on another project and it doesn't get done until I happen to remember or come across it again. 
Once the feather was heat embossed I noticed the paste leaked under the stencil so I used a black Stabilo All pencil and water to darken around the feather a little. It didn't completely cover the white but made a nice shadow around the feather. This is before the pencil. I then add the sentiment stamp and some ribbon and charms at the top.
The wonderful puffiness of this technique really makes the central feather standout and it needed little more to finish it.

I hope you enjoyed this tutorial. Please let me know if you have any questions or comments about it. And if you try this technique or have already tried it please share your creations here. I'd love to see and hear how you used this double embossing technique.

Happy Creating!
Wendy


Sunday, July 6, 2014

More fun with texture paste.

Have I mentioned that the Textured Grid Canvas workshop is my favourite workshop right now. Well if I haven't, now you know. I had a great little group of ladies in the studio today with so much creative power. Again some amazing results from this workshop.
Kathy

Lesley

Nancy
I just can't get enough of all these texture pastes. I'm in the process of trying out some more brands of texture paste because apparently if I see it have to buy it. I have a few more coming my way in the near future so I see some new projects happening in my future.

Keep Creating!
Wendy

Saturday, May 3, 2014

All about the texture paste...


Last weekends workshop was the Grid Canvas. It's all about texture paste. I think it's my favourite workshop to teach this year. I love playing with texture paste and it's so interesting to see the creative variations that my students do. And you know how I'm always saying my students inspire me so much. Well this time was no exception and the canvas above is one I finished a few days later from some of the sample grids I did during class. It's called 'Longing for summer' because that's how I'm feeling right now.
Here are the canvas' of my students that day.
Joanne

Josee

Katherine

Laurie

Linda

Tracy
Didn't they do a great job? Just looking at them makes me want to get more paste out and play. But not today, I'm getting ready to teach a Memory Frame necklace workshop at the Goulbourn Museum tomorrow.

Now that you're inspired, the new spring/summer workshop is up on the workshop page. Take a look and let me know what you think. Anything you were hoping to do but is not on the schedule? Let me know. Also I'd love to hear from you about when you like to take workshops. Do you like weekends(Saturday or Sunday), weekday, evenings? Do you like full days, half days or just a few hours for workshops? I've been doing mostly Saturday full days but would really like to hear what you would like most. Thanks ahead for the feedback.

Keep Creating!
Wendy


Monday, March 31, 2014

Fun with texture paste.

This past weekend was my Grid Canvas workshop and what a fun and creative group of women I had here in the studio. I was just amazed at the works of art that they created. Take a look.
Cecilia

Charlotte

laurie

Olive

Pat

Peggy
In this workshop, when it comes time to add the embellishments I have many to chose from or the students can bring along some of their own. This time around a few of them used almost all of their own found objects making the project very personal to them. One student used buttons and other elements collected over the years, while another had a  necklace she disassembled to use parts of on her canvas. And a third used one focal element letting the texture stand on its own. 
What do you think? Have you tried playing with texture paste yet?

Happy Creating!

Monday, August 12, 2013

Amazing students work


On Saturday I taught my textured grid canvas to 2 wonderfully creative women. It was my first time teaching this workshop so it was nice to just have the 2 to try it out on. We had great fun with all the different texture pastes and then choosing bits and bobs to go with it. Teaching always inspires me but with this group I even got a few new ideas to work on.

Kim

Sharon
Did you do any creating over the weekend?

Happy Creating!
Wendy

Thursday, March 28, 2013

Projects in progress.

Book swap backgrounds

If you don't already know this about me, I must tell you, that I rarely only work on one project at a time. Sometimes one gets put away to work on another but often they just start piling up here and there until I'm forced to clean to have space to work again. It's just how I roll. I don't question it any more. But some days I look around and wonder how the studio got to this point of disarray. I'm sure I couldn't have done it all on my own but there doesn't seem to be anyone else around to blame. That's when I know that I share my space with fairies who keep working on things when I'm out of the studio. They're usually pretty helpful at fixing creative blunders or blocks but they are very messy workers.
Well today is one of those days when I walked in the studio and am sure the fairies have been at it again. First of all above you can see the pages in progress for a book swap that's due in April. If I leave them on the table, every once in a while some new things just happens to them. 
Hmm...where to go from here!
 And then their is the painting projects I started. A few weeks ago while visiting Laura Daub's new studio, across the road I discovered another wonderful new shop, Malenka where Katrina transforms or as she likes to put it 'refreshes' old tired furniture. Well the wheels just started turning and I had to try out this inspiring new paint she sells by Annie Sloan called Chalk paint. First I bought a small jar of Duck Egg to try out on my last Ikea drawer set. This is as far as it's gotten. I'm thinking texture paste and lots of antiquing but you can never be too sure how these thing work out so who knows really.
Oh my that's orange!!
And then I had to go back to get some Barcelona Orange for this bedroom bookshelf and possibly a dresser. I have to admit I'm kind of stuck now with this one. I know it's not done but I haven't decided just how antiqued and/or distressed I want it. Also the dark wax isn't working exactly how I expected to so some experimenting is in order. I think it's going to go back into the room to contemplate on it some more. Also I've run out of time and need to clean the studio for Easter weekend. 

If you have some time this weekend, I highly recommend these wonderful shops in the Britannia area of Ottawa. Go Saturday afternoon and do some doodling with Laura. I went last Saturday and had great fun and learned some new doodling designs.

Have a Great Easter weekend.

Get creative!

Wendy


LinkWithin

Related Posts Plugin for WordPress, Blogger...