Monday, May 23, 2011
Grungy Monday
I really enjoyed last weeks Grungy Monday. Thank you all for such lovely comments.
This weeks Technique is an easy one again but my choices of dye inks is very limited so I wasn't feeling very inspired. I'm afraid I didn't sway much from the sample. Check it out here.
http://timholtz.typepad.com/my_weblog/2008/08/september-techn.html
I've done water colour stamping before but I have to say it's not one of my favourites. I find it hard to get just the right amount of water on the stamp so you don't loose your image completely. On this card I tried Glimmer mist instead of water and I really liked the results and it seemed to be easier to not over do the wetness. Unfortunately you can't really see the glimmer here though.
I'm curious to see how others have used this technique since I can't really think of a lot of uses for it. I think I prefer techniques that I can play with and change up a little more than this one.
So head over to Studio L3 and see what others are doing with this technique.
Happy Creating
Wendy
Monday, May 16, 2011
Wow guest designer for Grungy Monday.
Yes me a guest designer! I'm so excited I can hardly write. See this is my first time, yes I'm a virgin guest designer, so be patient with me if I stumble or fumble a bit and please help me if you see anything I should be doing differently.
So here's the juicy details. Linda over at Studio L3 host Grungy Monday each week in honor of his Craftiness Tim Holtz. Each week she chooses a Tim Holtz technique and asks 2 guest designers to make something with the technique and post about it. So this week it's my turn.
This weeks technique is Distress Ink colour blocking. It's an easy and versatile way to make a background.
As soon as I got the e-mail from Linda with the info I watched the video right away. And although it's a really easy one I was kinda stumped for ideas. I played with it on some scraps of plain paper to get the hang of it and try out different colour combos. Then I let it sink into my subconscious for a week or so(no I wasn't procrastinating...okay maybe a little) things started to form and once I started it the project grew from a small plaque to a whole book. LOL. That's just the way things work out sometimes. I actually didn't get all the pages done that I wanted to. I have 2 more on the go. Hopefully I'll get them done in the next day or so and can show you then.
I used the Colour Blocking technique for the background of each page. On this one I adhered some old book print on one side first and then did the colour blocking across the whole thing. It was interesting to see the different effects on the 2 surfaces. The inks reacts differently on the different surfaces creating different colour intensity.
Here I used a numbers Crafters Workshop stencil on the already colour blocked background. It just took a little Tea Dye DI to get the numbers to pop out over the blocking. I like the way it tones down the but doesn't completely cover them.
Again here I used some scrap paper to cover part of the background before doing colour blocking. This paper reacted differently from the old book print. I think the old book print absorbs some of the ink making it more muted that other surfaces.
This book was a lot of fun to create. Can't wait to get the last 2 pages finished. It's been a while since I've done this kind of project and I hadn't realized how much I missed it and really must find more time to do this kind of creating.
I hope you enjoyed my book today. You really must go over to Studio L3 to check out what everyone else has done with this technique.
Here are the supplies I used:
Crafters Workshop- stencils
Ranger- Distress Inks
Sizzix- Dies
Tattered Angels- Glimmer Mist, stamps
Studio 490- stamps
Tim Holtz- stamps
Hampton Art- stamps
Prima- flowers, leaves
BoBunny- Edgy Album
Thanks for stopping by have a creative week.
Sunday, May 15, 2011
Exciting week ahead...
I'm looking forward to this week. Some new things are happening for me and I'm so glad you're here to share them with me.
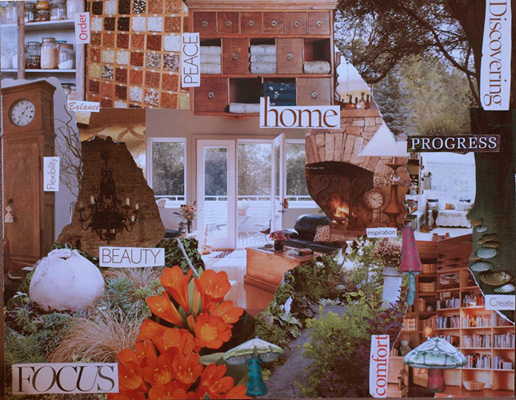
This week my vision board is being featured by Michelle over at Collage Your World. A few months ago I was lucky enough to have Michelle come into my studio to teach a vision board workshop. It was wonderful to get a group of like minded people together and work on our vision boards together. I learned how to make a vision board and it began me on a journey that still continues. Read more about it here.
Stop by tomorrow to see what else new is happening to me this week.
Friday, May 6, 2011
Sneak Peek.
This is just a quick post to tease you a bit. I'm almost ready for tomorrows Handmade Harvest show. I've been busy trying out some new designs.
This bracelet is made with textured copper discs and carnelian beads. I have 3 more similar bracelets I hope to get together by tomorrow. No pressure!!
These earrings are just one of many new design I've been playing with. Some are etched, some are textured with hammers and some are riveted.
So that's all you get. Come and see me at Handmade Harvest tomorrow from 10am to 5 pm. If you get their early enough you might even get one of the 50 Swag bags they're giving away for those that show up first.
Have a great weekend!
Wednesday, May 4, 2011
So busy and WOYWW.
Well I keep telling myself I'm going to blog more. I'm going to keep some kind of schedule in my life but then life gets away from me again. But I'm back on track, at least the blogging track any way. I've been busy preparing for this weekends Handmade Harvest show in the Almonte Agricultural Hall. It's a must see show on Saturday May 7 from 10am-5pm. The first 50 people get free swag bags. Now who can resist that. At the last show people were lined up before the doors opened! So now you know why I haven't been blogging and here is what I've been up to.
This is how I left my work table last night. See the white box that says ready for tumbling?That's todays job. Well I might get a few more pieces ready to tumble first, but then it's into the tumbler and then they have to be assembled into wonderful jewelry creations. Mostly I'm working on some new earring designs but a necklace and a few bracelets got in there when I lost focus on earrings. Does anyone else have this problem? When I'm set on creating one thing other things take over. I've learned to go with the flow. I usually get some of my favourite pieces during these times.
This is the long side view of my work table. As you can see I've been using my new disc cutter and dabber. Sooo much fun!! I've finally been able to make some of those designs that have been in my head for ages. You would think this would leave a little empty space in my brain but no, the more I ideas I use the more ideas come into my head. I've been thinking about what I'm grateful for lately and today I think that is what I'll be grateful for, an endless supply of creative ideas to work with!
So I'm off to get more out of my brain.
If you'd like to check out some more creative desks go over to Stamping Ground for WOYWW.
Have a wonderful creative day.
Subscribe to:
Posts (Atom)